
Three Bean Chili
In December we throw a cookie party at our house. It started as a cookie and board games party, but as we’ve gotten a bit older and the number of friends’ babies multiplied and we adopted a dog, it has become more about catching up and making sure the kiddos are entertained while Sparrow (the pup) doesn’t steal anyone’s cookies rather than playing any games ourselves.

Introducing Sparrow and her ability to keep her eye on the prize
I always make some kind of cookie to contribute but my non-baking husband felt left out and declared that he wanted to contribute: he’d make chili! So, now it’s a cookie and chili party. Ok, latkes got folded in there as well, but that’s not what we’re here to talk about. We’re here to chat about chili!
What I love about chili is the trifecta of texture, spice, and meaty-ness. It needs to have something to “chew” and that visual of a lot of great things going on - tomatoes, peppers, beans, all-the-toppings. The spice needs to be balanced; yes to heat and smoke but not so much as to blow out your taste buds on the first bite. And you get plenty of umami from meat! But there are many different foods that provide umami.
I consider myself an omnivore, but I’ve been exploring vegan and vegetarian cooking because while I don’t believe going strictly meat free is right for me and my family, I do think decreasing our meat intake is important for our health and our planet’s health. And I take it as a challenge - how can I make a vegetarian chili that will satisfy my meat loving husband? As a food scientist, I lean on science, obviously!
Proteins, like those in meats, are comprised of strings of amino acids held together by peptide bonds. Heat, acid, or enzymes can interrupt these bonds and free amino acids, allowing us to taste them. The most recognized amino acid flavor amongst humans is glutamic acid, known for its savory flavor. When glutamic acid is concentrated and commercially produced, it goes by the name of monosodium glutamate (MSG). Many fermented products are particularly savory because they either produce acid or enzymes that break peptide bonds and release amino acids. Think of the flavor of aged sausage, parmesan, or soy sauce. That depth of flavor that is on the edge of bitter or sweet is the result of breaking up proteins into their smaller amino acid blocks.
For this recipe, I wanted to pile on as many sources of amino acid as I could. The first one was easy, it’s the base of all (I assume all) chili recipes: tomatoes. The humble tomato is the perfect source of umami for chili because it brings savory, sweet, and acid together, three out of five of the basic tastes you need in a dish! But on its own it can be one dimensional, so I added two more:
Mushrooms
Red Miso

Mushrooms are chock full of free (unbound) amino acids, both MSG and guanosine monophosphate (GMP), which has a synergistic flavor effect with MSG. Roughly chopped and sauteed in oil, mushrooms have some resemblance to ground meat but are really there for flavor and build in more texture. To create the same volume of cooked mushrooms as a pound of ground meat would take upwards of 50 oz of mushrooms because the cell structure of mushrooms just collapse when heated and water is removed, not unlike wringing out a sponge and seeing it shrink as it dries. Brown mushrooms have more flavor than white mushrooms, so I picked the easy to find crimini mushroom (also called baby portobello). If you wanted to use shitaki or protobello or can only find white mushrooms, those will work as well.
Red miso, or aka miso, is my number one go to when I need to add depth to any dish. I use it like I would a bouillon cube or bouillon paste (which I also love!) when I want to balance out acid and bitterness in a dish. I wanted to bring out the funkier side of meat umami and miso is a great way to emulate that. Red miso is fermented for a year or more, so it generally has a deeper, richer flavor than white miso. It’s a bit saltier and more acidic than white miso as well. The salt is to help preserve it for the longer fermentation and the acid is a result of the amino acids breaking down further, bringing out the acidic part of their name.
For my other chili ingredients, I decided to keep the basics. I stuck with a more traditional sofrito base - bell peppers, onions, garlic - but I encourage chopping the peppers and onions on the larger side so you can see them. For a similar reason I decided I liked the look and texture of canned diced tomatoes rather than ground (ground tomatoes give the chili a mushy appearance).
For protein - chili needs a protein, duh - I turned to two different beans and a lentil. Kidney and pinto beans not only give great visual contract, but kidney beans have a bit more firmness in contrast to pinto’s buttery texture. I also added the quick cooking red lentil (masoor dal) for a final textural and visual element to bolster the chili. I see no reason you couldn’t substitute quinoa for the lentil if that’s what you have or prefer; just make sure to rinse it well, since unrinsed quinoa is bitter.
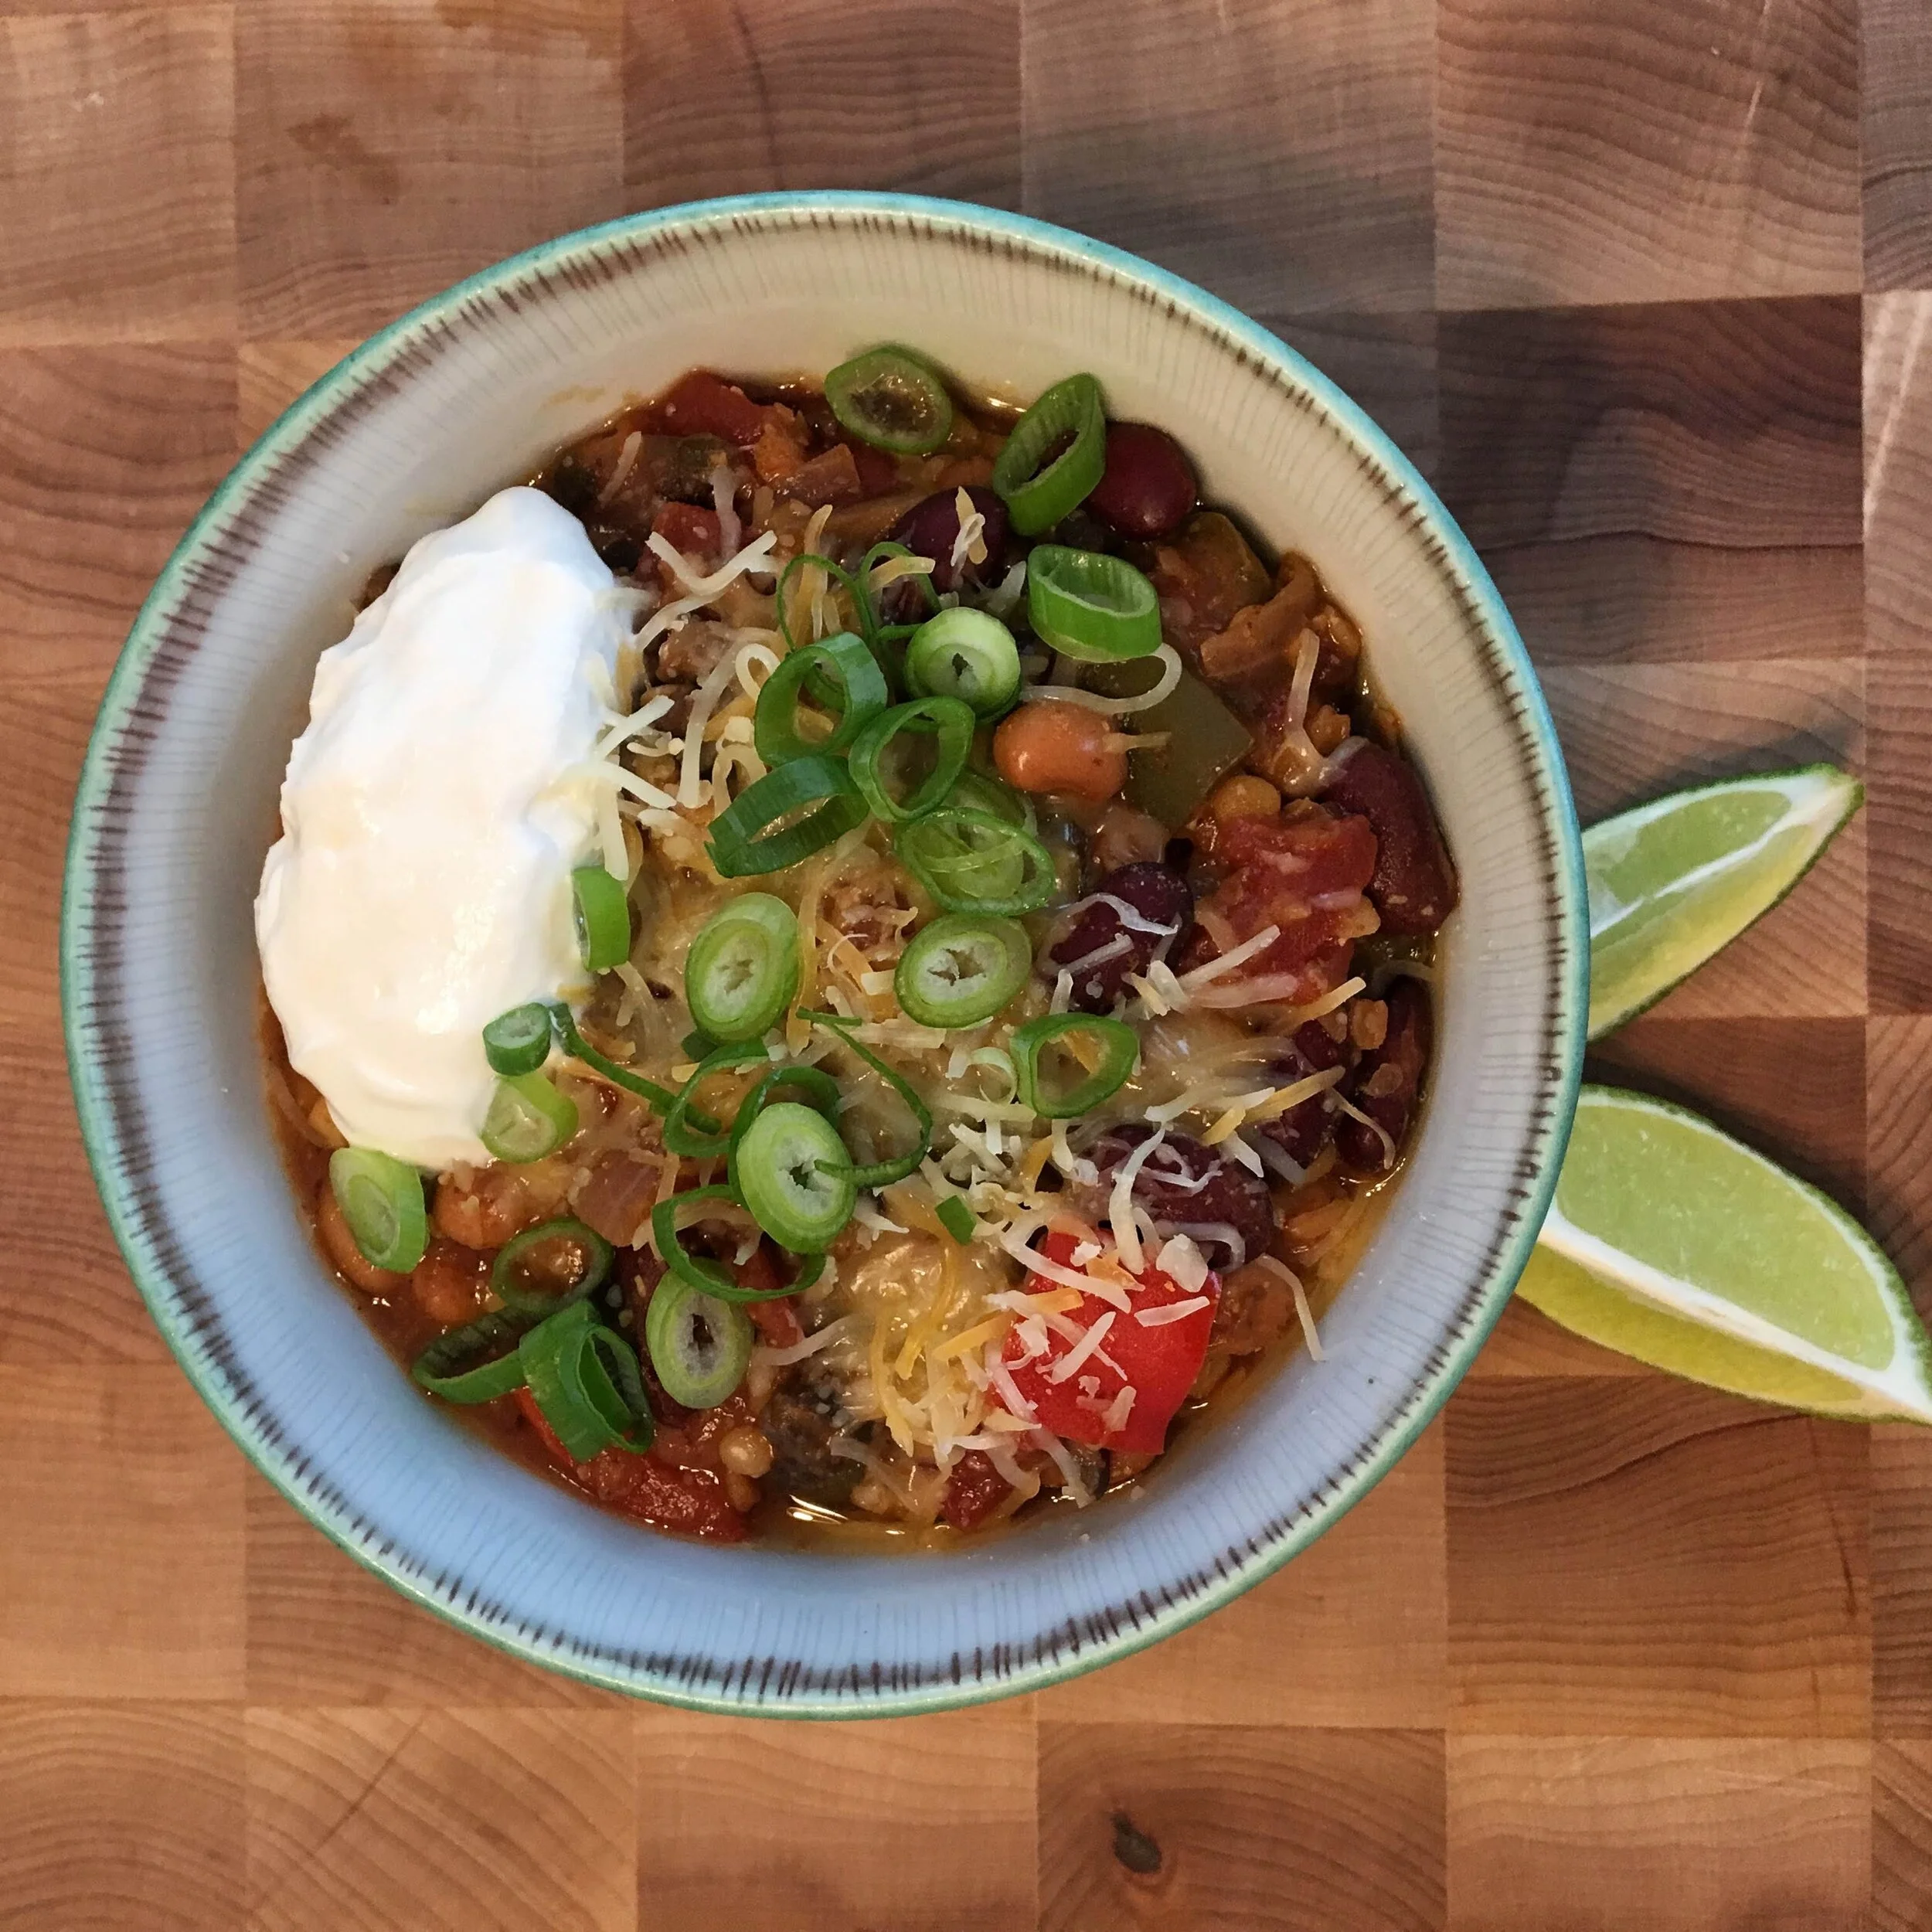
Garnished with favorite chili accompaniments, this is a satisfactory meal all winter long!
6-8 servings, cook time 1 hour
3 tbsp olive oil
3 green and red bell peppers, diced into 1” pieces
1 large red onion, diced into 1” pieces
4 cloves of garlic, chopped finely
16 oz crimini mushrooms, roughly chopped so largest pieces are about ½” big
Salt to taste
1-2 tbsp chili powder, depending on how hot you like it
2 tbsp red wine vinegar
1-28 oz can of diced tomatoes
1-15 oz can of pinto beans (anything but no salt added), rinsed
1-15 oz can of kidney beans (anything but not salt added), rinsed
1 cup red lentils (also called masool dal), rinsed
1 can chipotle peppers in adobo sauce
1 tsp Mexican oregano (optional)
3 tbsp red miso
Your favorite chili garnishes! Try: green onion, cilantro, cultured dairy (or dairy alternative), cheese, lime
Heat 2 tbsp of olive oil in a dutch oven or other large pot over medium high heat. When the oil flows more like water when swirled in the pan or is beginning to shimmer, add your bell peppers, onion, and garlic to the pot. Let them cook to soften slightly, about 5 min; the onion will be more opaque.
Add your mushrooms and continue to cook, stirring occasionally, until the vegetables have lost most of their moisture and begin to brown on the bottom of the pan. Now is the time to season the vegetables well with salt. Start with a teaspoon, you can add more as needed.
Add your chili powder and cook it with the vegetables for a minute. Deglaze the pot with your red wine vinegar, making sure to scrape up all the browned goodness. Cook for 1-2 minutes so the acetic acid from the vinegar cooks off a bit.
Add your can of diced tomatoes, rinsed beans and lentils, 2 diced chipotle peppers and 1 tsp of the adobo sauce, Mexican oregano (if using), and 2 cups of water. Stir to incorporate everything together.
Measure out your miso into a small container. Dip the container into the cooking liquid to remove about ½ cups worth. Mix the miso and cooking liquid together to loosen the miso paste. This is how you don't get clumps of miso in your chili! Stir the loosened miso into the chili and taste. Add salt as needed.
Bring your chili up to a boil, then turn it down to a simmer. Let it cook for 20-25 minutes, until the red lentils are tender but not falling apart. Stir the pot occasionally as it cooks to prevent the bottom from burning.
Once the lentils are cooked, taste your chili again and evaluate. Do you need more heat? Add a touch of adobo sauce or chili powder. Salty enough but still a bit flat? Try a touch of olive oil and/or a pinch of sugar or honey to round out the flavors.
Ladle the chili into bowls and serve with your favorite chili garnishes. It’s fun to let people garnish their own bowls as they like.

Adding miso into the chili
Tips and notes
To judge piece size, I don’t pull out a ruler but use my fingers to help me measure! I know for me from the tip of my pointer finger to my first knuckle is about 1”. Measure your fingers once and you too will be able to guesstimate piece sizes.
General credit to Harold McGee On Food and Cooking, which I used to refresh my memory on amino acids and peptides because boy it’s been awhile since I’ve had to write about them! Also gleaned some cool mushroom info about GMP I didn’t know previously.